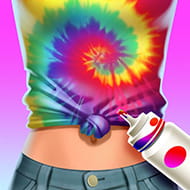
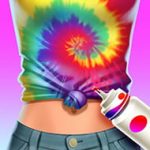
You hold a plain white T-shirt at the start of Tie Dye, and by the time the reveal animation plays — rubber bands pulled off, fabric unfolded — you either have exactly what the customer asked for, or something more interesting than you planned. The game runs on that gap between expectation and result, built around five sequential steps that simulate the actual tie-dye process: wrap the garment, secure it with rubber bands, apply color, dip it in the dye vat, then unbind. Each step is a separate interaction, and each one changes what the final pattern becomes.
| Genre |
Casual / Creative |
| Platform |
iOS, Android, Browser |
| Levels |
Approximately 30+ |
| Controls |
Touch / Mouse drag |
The Five-Step Process That Drives Tie Dye
Each level in Tie Dye moves through five phases that mirror real-world technique closely enough that players with craft experience will recognize the logic immediately. Step one is the wrap: the garment — a T-shirt, cheerleader skirt, party dress, or one of several other clothing types — is scrunched, folded, or twisted into a target shape by drawing a figure-eight or folding in a guided direction. The wrap shape determines whether the final design produces spirals, stripes, bullseye rings, or a looser crumple pattern, which makes it the most consequential decision in the process even though it comes first.
Step two is securing the shape with rubber bands by tapping specific points on the wrapped fabric. Where you place the bands affects how dye spreads in the next step — tighter bands create harder color borders, wider spacing lets colors bleed into each other. Players rushing through this step to reach the color application end up with washed-out boundaries that reduce the visual punch of the reveal. Step three is color application, which is where the game opens from guided replication into genuine creative input. Some levels present a client with a specific color request. Others — the ones most players prefer — give you an open palette and ask only that you make something compelling.
Fold Logic and Color Spread in Tie Dye
The most important thing Tie Dye teaches — usually through accidental discovery rather than explicit instruction — is that fold shape and color placement interact rather than operate independently. A spiral fold divides the wrapped garment into pie-slice sections radiating from a central twist point. Apply a different color to each slice and the reveal produces a clean rainbow spiral. Apply two alternating colors to adjacent slices instead, and the bleed zones where they meet create a third blended color that was not in the original application. This emergent mixing is what players who spend serious time with the creative mode find most engaging.
The bullseye fold — pinching the shirt center into a cone and wrapping rubber bands at intervals down it — produces concentric rings. It is the fold that most reliably delivers a clean, readable pattern when the customer wants structure, and the one beginners gravitate toward because the relationship between application point and final position is predictable: dye applied at the cone tip appears at the center of the design, dye applied lower appears as the outer rings. The accordion fold, where the garment is pleated flat like a paper fan, produces stripes. Rubber band spacing is the key variable here — close bands give narrow stripes with sharp edges, wide spacing gives broader zones with more bleed between them.
By the time you reach mid-game levels, clients start requesting multicolor gradients within a single section, which requires more precise bottle control than the early levels demand. Players who developed sloppy application habits in the first dozen levels find these requests genuinely difficult, not because the mechanic changes but because the margin for imprecision shrinks. The dip step — dragging the bound garment through the dye vat — also becomes more consequential at this point: a too-shallow dip leaves inner fold sections pale when the customer wanted full saturation, while a too-deep dip muddies color borders that took careful placement to establish.
What Beginners Get Wrong in Tie Dye
The most common early mistake is treating color application as the only creative decision. New players focus heavily on hue selection while treating the wrap and rubber band steps as procedural tasks to complete before the “real” part. This produces flat or muddy results because the fold geometry was not set up to let those colors interact usefully. The game rewards designs that read clearly from a distance, and saturated colors applied to a poorly structured fold score worse than modest colors on a clean spiral or bullseye.
A second mistake is under-using the full surface of the garment. On larger items like dresses and cheerleader skirts, players apply dye to the most visible section and leave the lower portions pale. The reveal animation shows the full garment, and sparse application on the bottom half makes designs look unfinished even when the top was carefully executed. Players who work dye bottles across the entire surface — including folded edges and sections that are hard to reach in the wrapped state — consistently produce results that score better.
The ad structure in Tie Dye is the most discussed complaint in every player community that covers the game. Mid-level interruptions — an unskippable ad appearing between step two and step three — disrupt the five-step flow in a way that ads between levels do not. Enabling airplane mode to suppress ads is the most commonly shared meta-tip regardless of platform, appearing in nearly every extended discussion about the game. The unlock gates for new dye bottles and rubber band styles, which require watching additional ads, add a second friction layer on top of the mid-level interruptions.
Common Questions About Tie Dye
- How do you get three stars on client levels in Tie Dye? Three-star ratings require an accurate color match to the customer’s request and strong dye saturation across the full garment. The most common star-drop happens when the dip step is too shallow, leaving inner fold sections pale. Using the correct fold for the requested pattern — bullseye for rings, spiral for radiating designs, accordion for stripes — and fully saturating the dye before dipping gives you the best chance of hitting three stars consistently.
- Can you mix colors in Tie Dye, or are sections fixed? Colors applied to adjacent sections will bleed into each other at the boundary during the dip step, creating a mixed zone that was not explicitly applied. This mirrors real tie-dye color behavior. Players who want clean separation should keep dye bottles away from band edges. Players who want blended transitions should apply two colors close to the same band and let the dip do the mixing work.
- What happens if you use the wrong fold for a client’s requested pattern? The game does not prevent you from proceeding with any fold configuration, but using a spiral fold when the client requested stripes produces a result that scores low on accuracy regardless of how well the colors were applied. Re-attempting the level with the correct fold — accordion for stripes, bullseye cone for rings — will almost always produce a significantly better score without changing anything else.
Tie Dye succeeds because the five-step process — wrap, secure with rubber bands, apply color, dip, reveal — translates the logic of real craft technique into a format where every step has a visible consequence on the final garment. The bullseye cone that produces concentric rings, the spiral that turns pie-slice sections into a radiating pattern, the accordion fold that locks color into clean stripes: each technique makes mechanical sense once you see the result. The reveal step earns its place every time — it is the moment where the work either comes together or shows you exactly what to adjust on the next run.






 Play Game


 Fullscreen